Swiroset.com

Powering future

Category Archive : Health Fitness

Getting Fit After 50: Retiree Fitness Leads To Retiree Health!

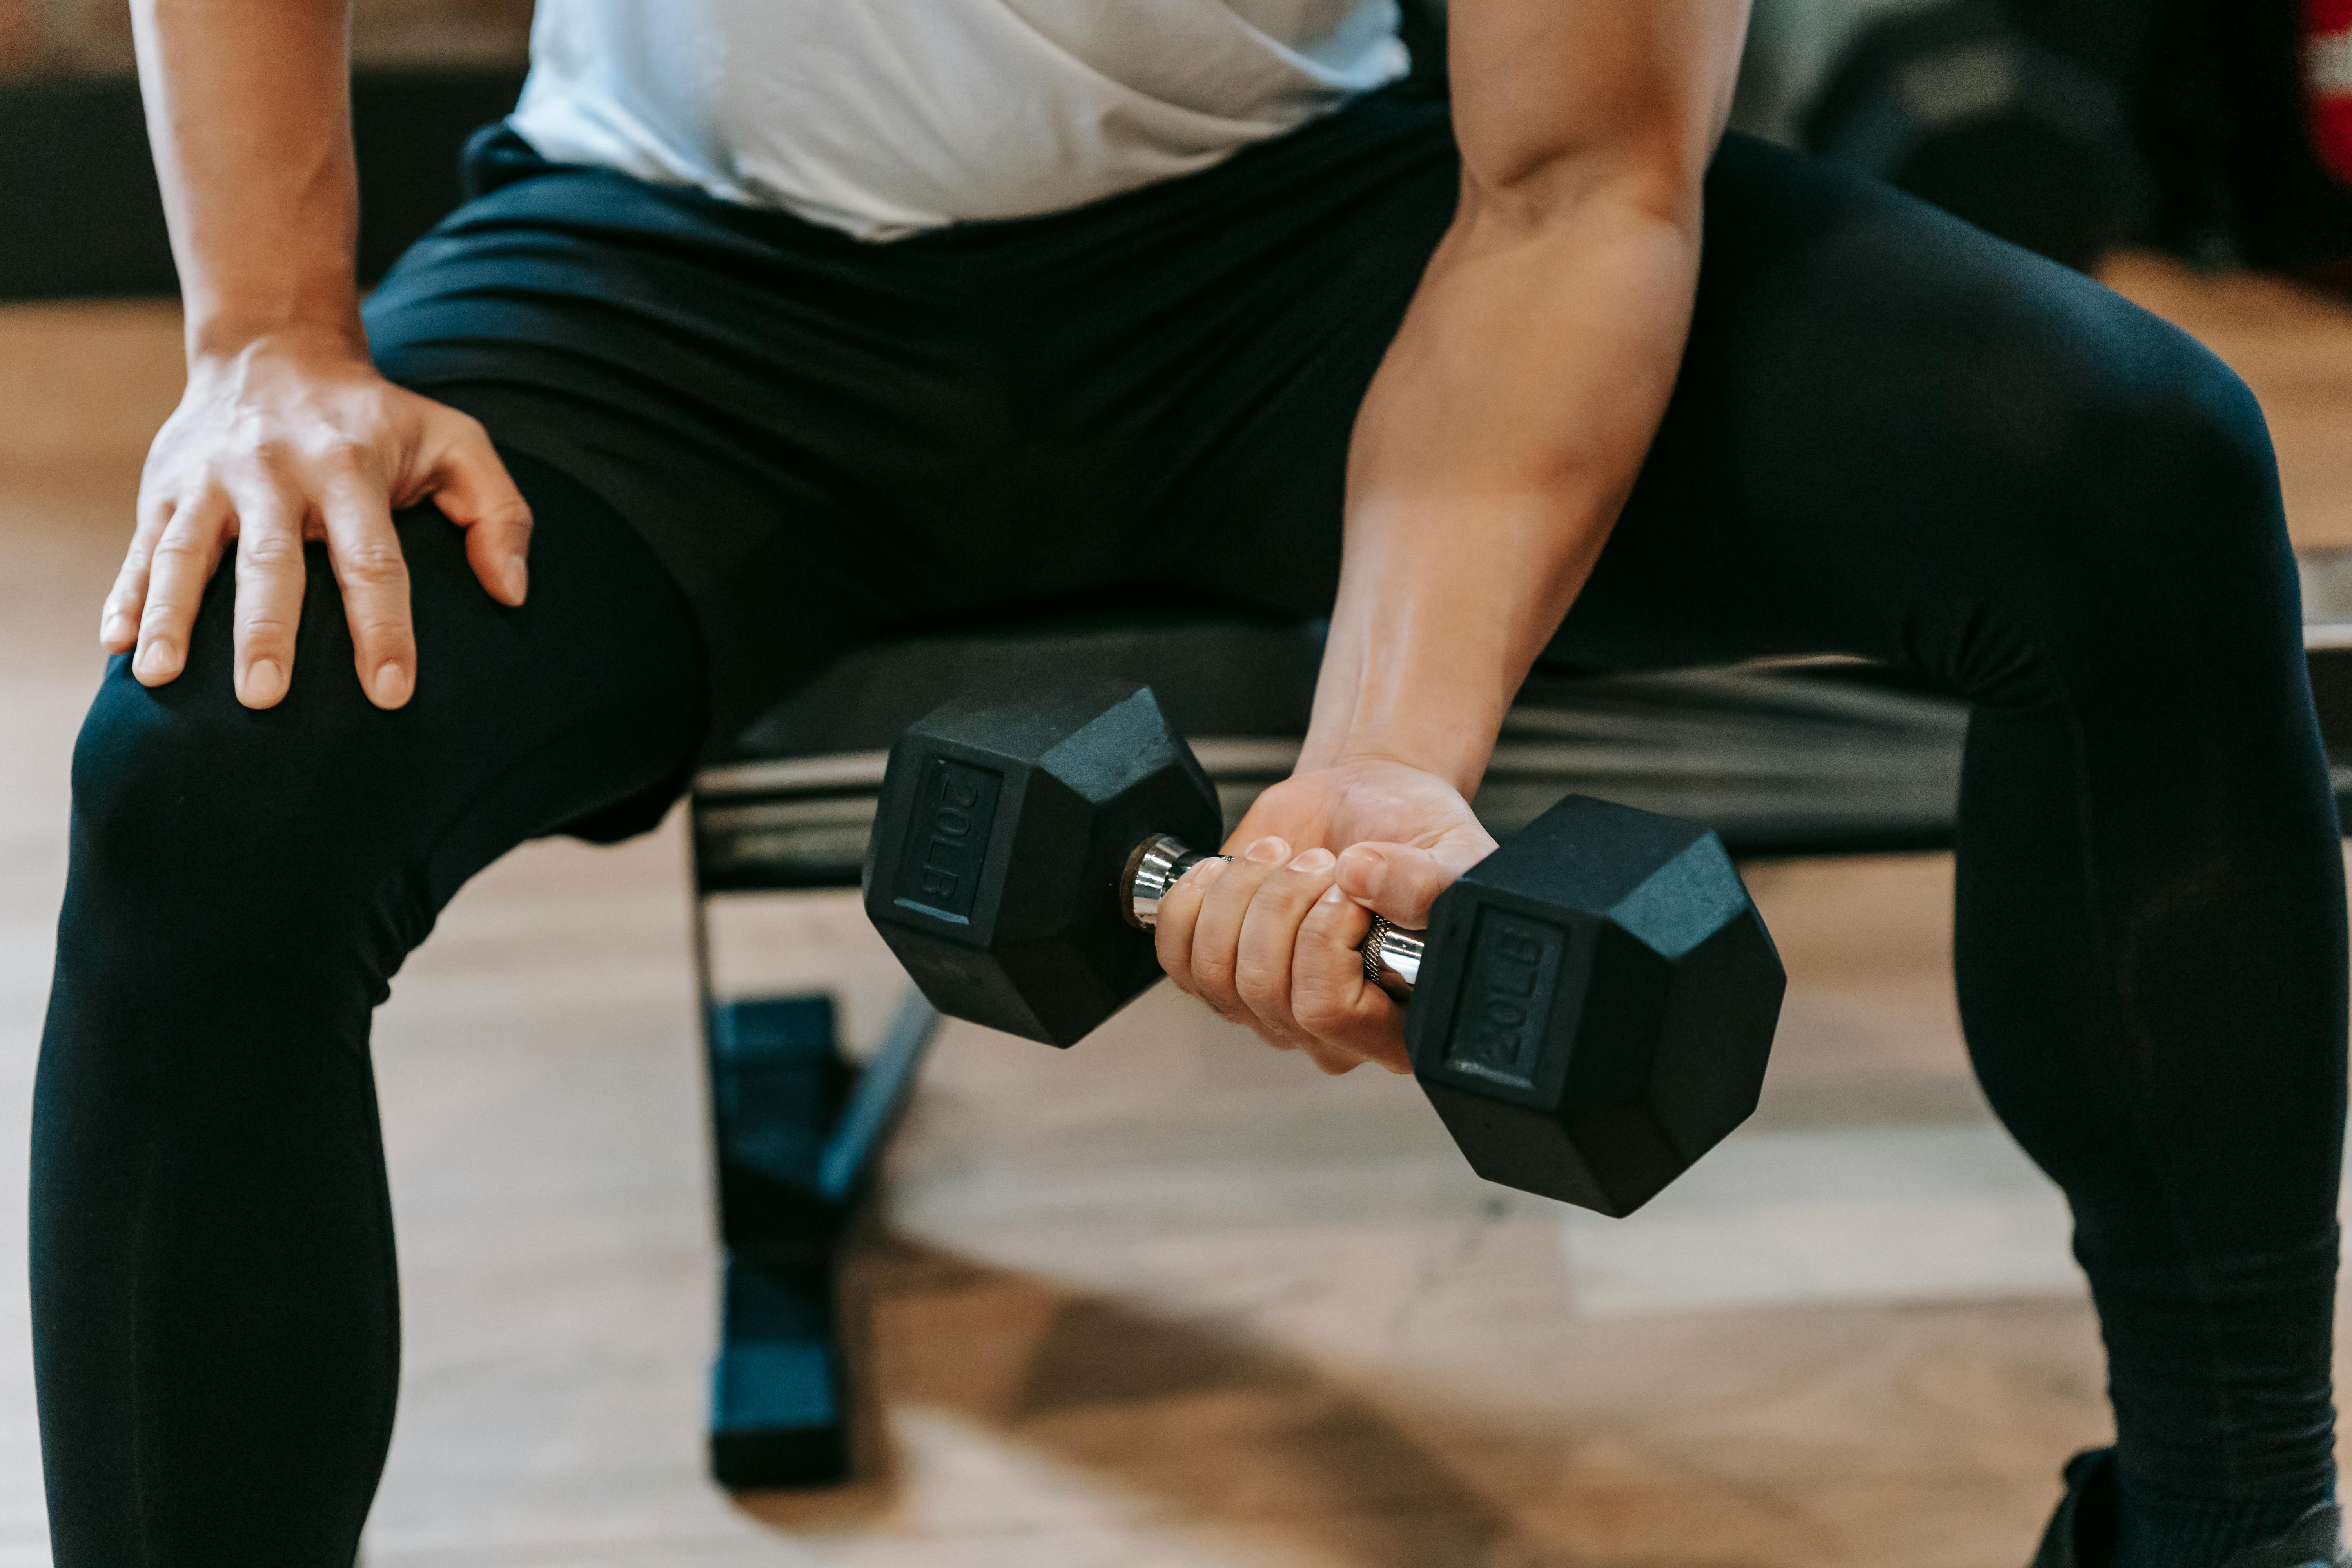
In recent years, research has shown that endurance is not as important as strength in improving functional capacity in older adults. A problem that affects many elderly people (especially women) is osteoporosis. You hear of many old people falling and breaking their bones; they can’t even get up to ask for help. Well the sad reality is that your bones break first and then fall out! Exercise with weights is crucial.

If you’re looking for strength, use heavy weights for low reps with plenty of rest between sets. If body composition is your goal and you want to reduce some body fat, use a lighter weight for more reps but a shorter rest interval. However, do not overdo it. Listen to your body. Sarcopenia, a condition in which muscles atrophy or waste away at a rate of 6 pounds per decade after age 30, is another factor to consider. The following program will help you build muscle mass.

A1) Back squat

A2) Lying Leg Curl

B1) Bent-over row

B2) Close grip bench press

C1) Abdominal Crunches

C2) Standing calf raise

Do 2-3 sets of 10-12 reps with 60 second rest between sets. Be sure to keep your movements slow and controlled. Perform the routine 3 times a week (every other day).

Restoration in the form of massage, contrast (hot/cold) showers and baths, or some light cardiovascular exercise (such as walking) and stretching may be helpful.

Lifestyle plays a crucial role. It goes without saying that recreational drugs, smoking, and alcohol will wreak havoc on your body no matter how old you are. Sleep is also important. Try to sleep before midnight (in fact, go to bed no later than 10:00 pm if possible) and wake up at the same time every day. A short nap or two during the day is also beneficial.

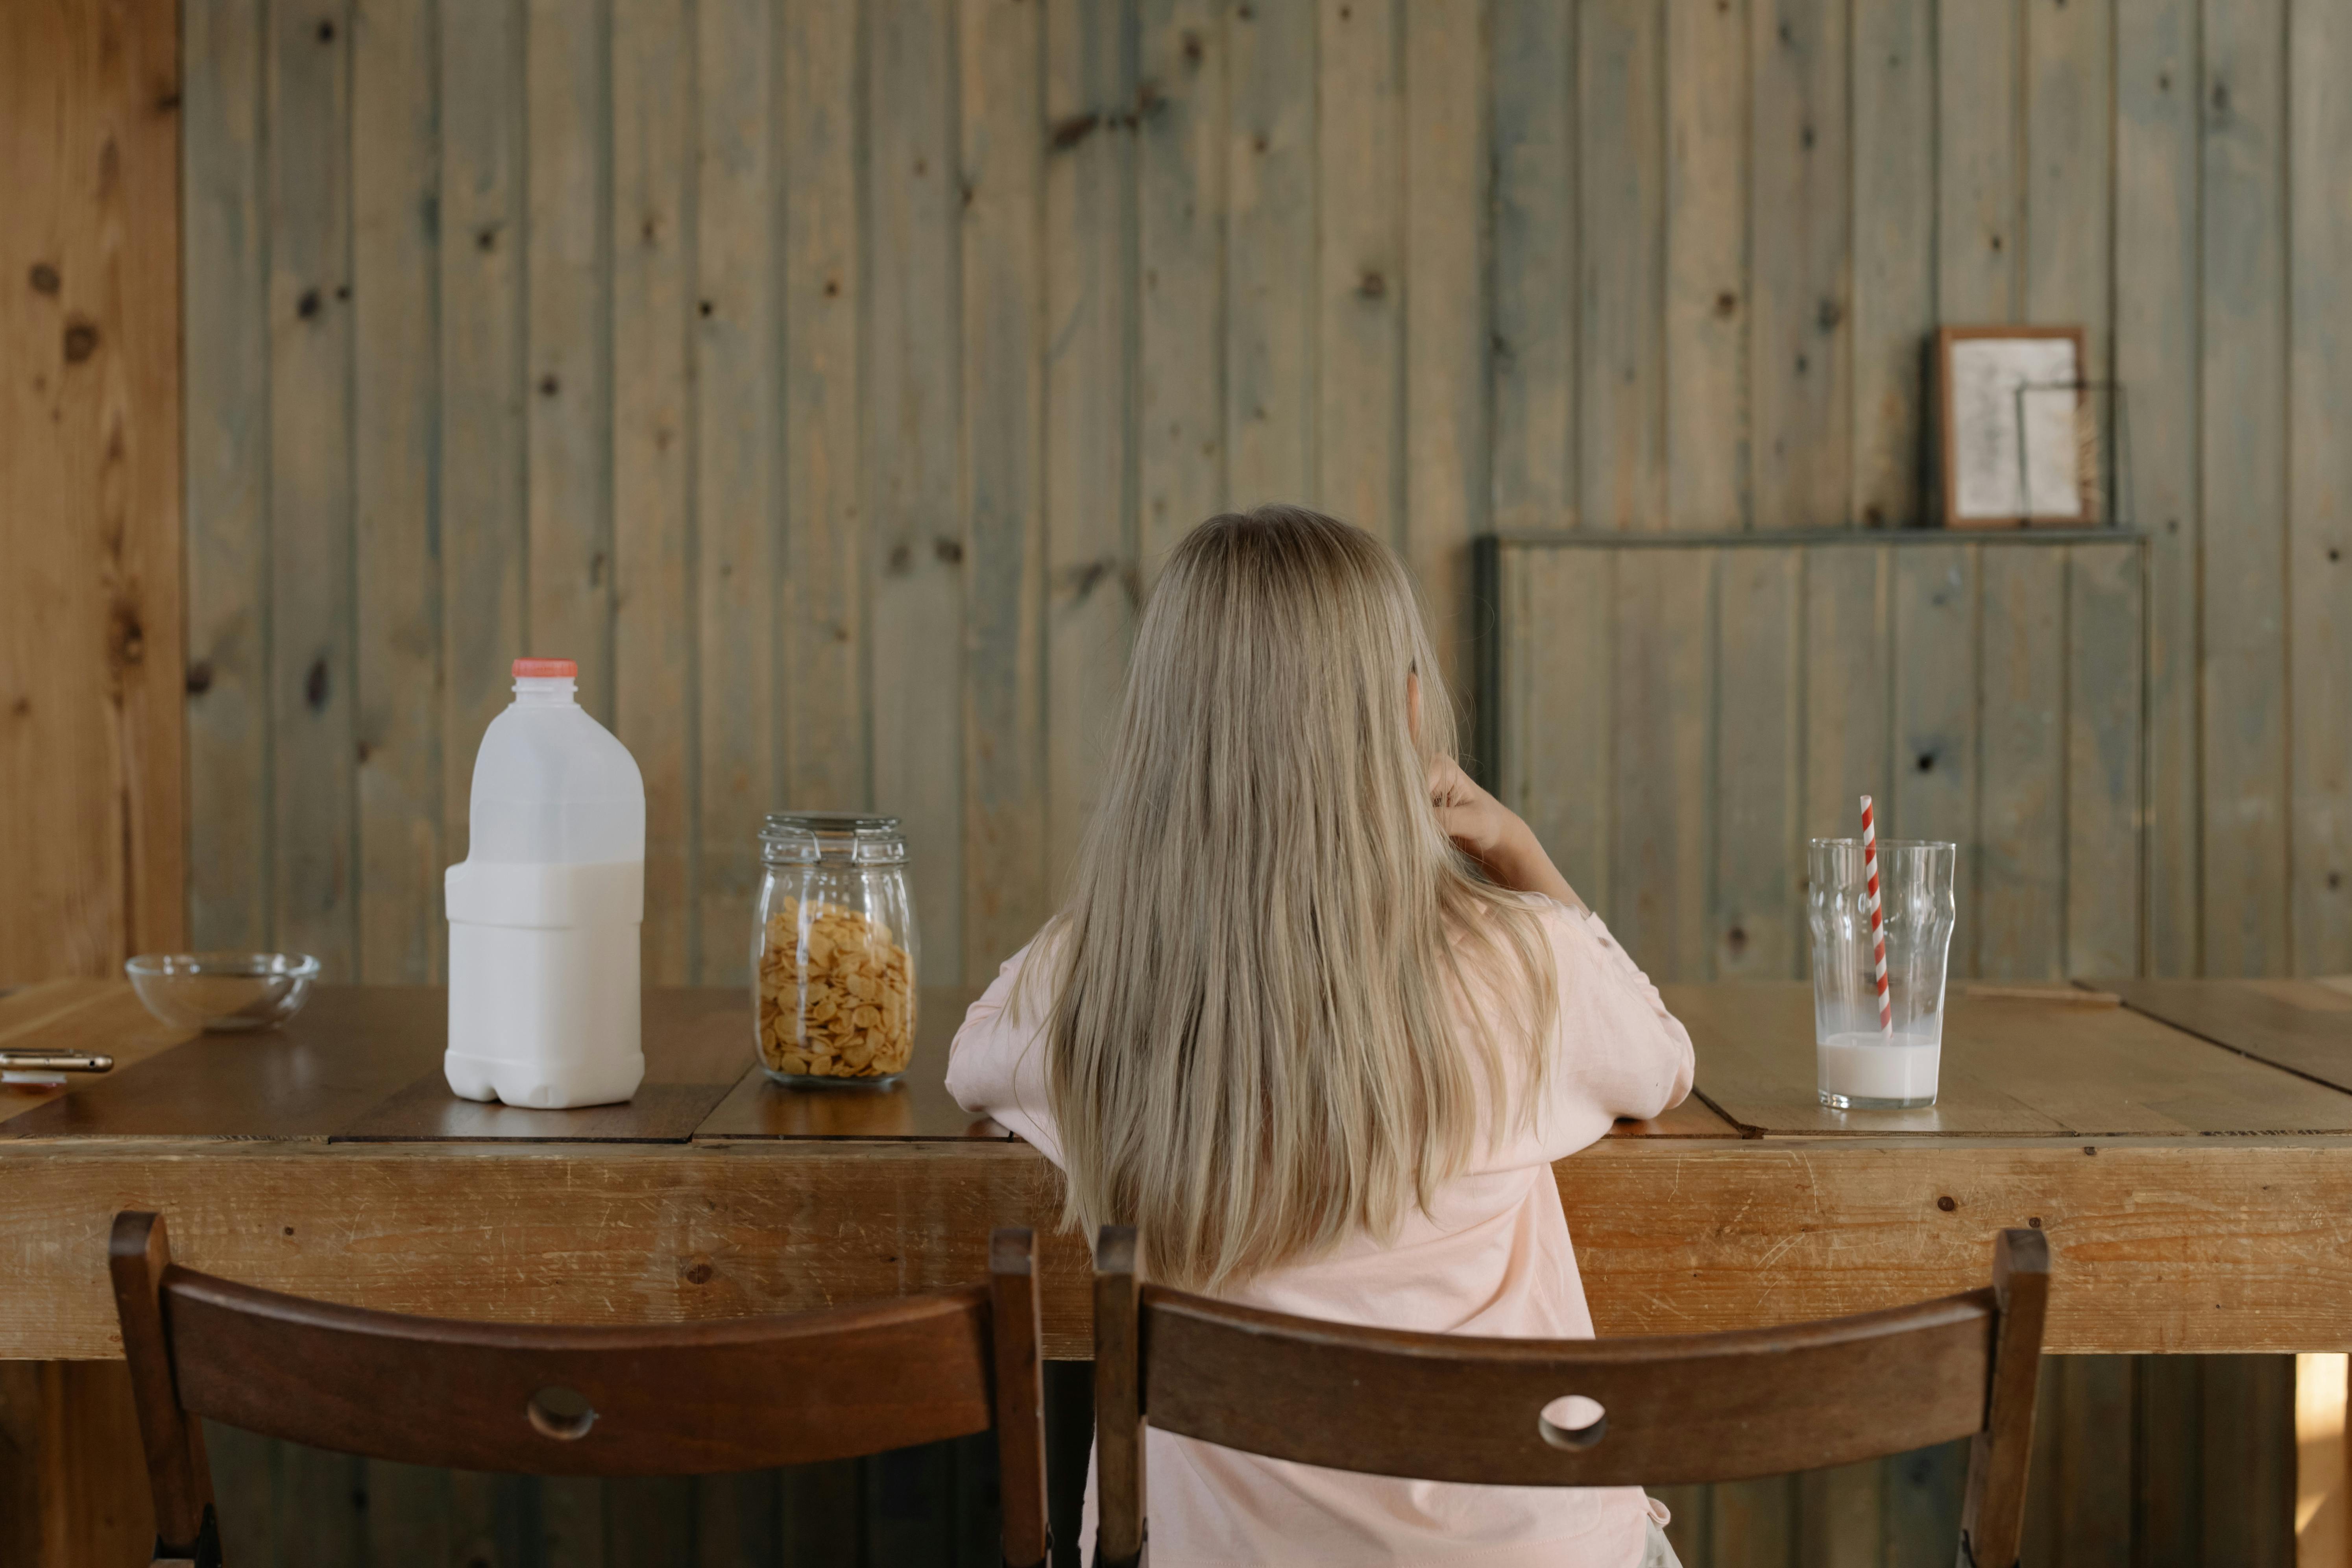
What about nutrition? For starters, most people need to clean up their diet by eliminating the processed and refined junk that litters their cabinets and refrigerators. That means no more cereal and juice for breakfast, or deli sandwiches and sodas for lunch, or pasta and wine for dinner. That also means sticking to the perimeter of the supermarket when shopping for groceries – forget the middle aisles!

Eat 4-5 small meals spread throughout the day and be sure to drink plenty of water. Dehydration is part of the aging process. At birth, 85% of the body is made up of water… when you die, it’s 50%! When the water reserves are falling, it indicates that something is wrong. It usually reflects a breakdown of muscle tissue. So make sure you stay well hydrated by consuming 5 ounces of water per pound of body weight.

Here is a sample diet:

Meal 1 – Spinach omelette

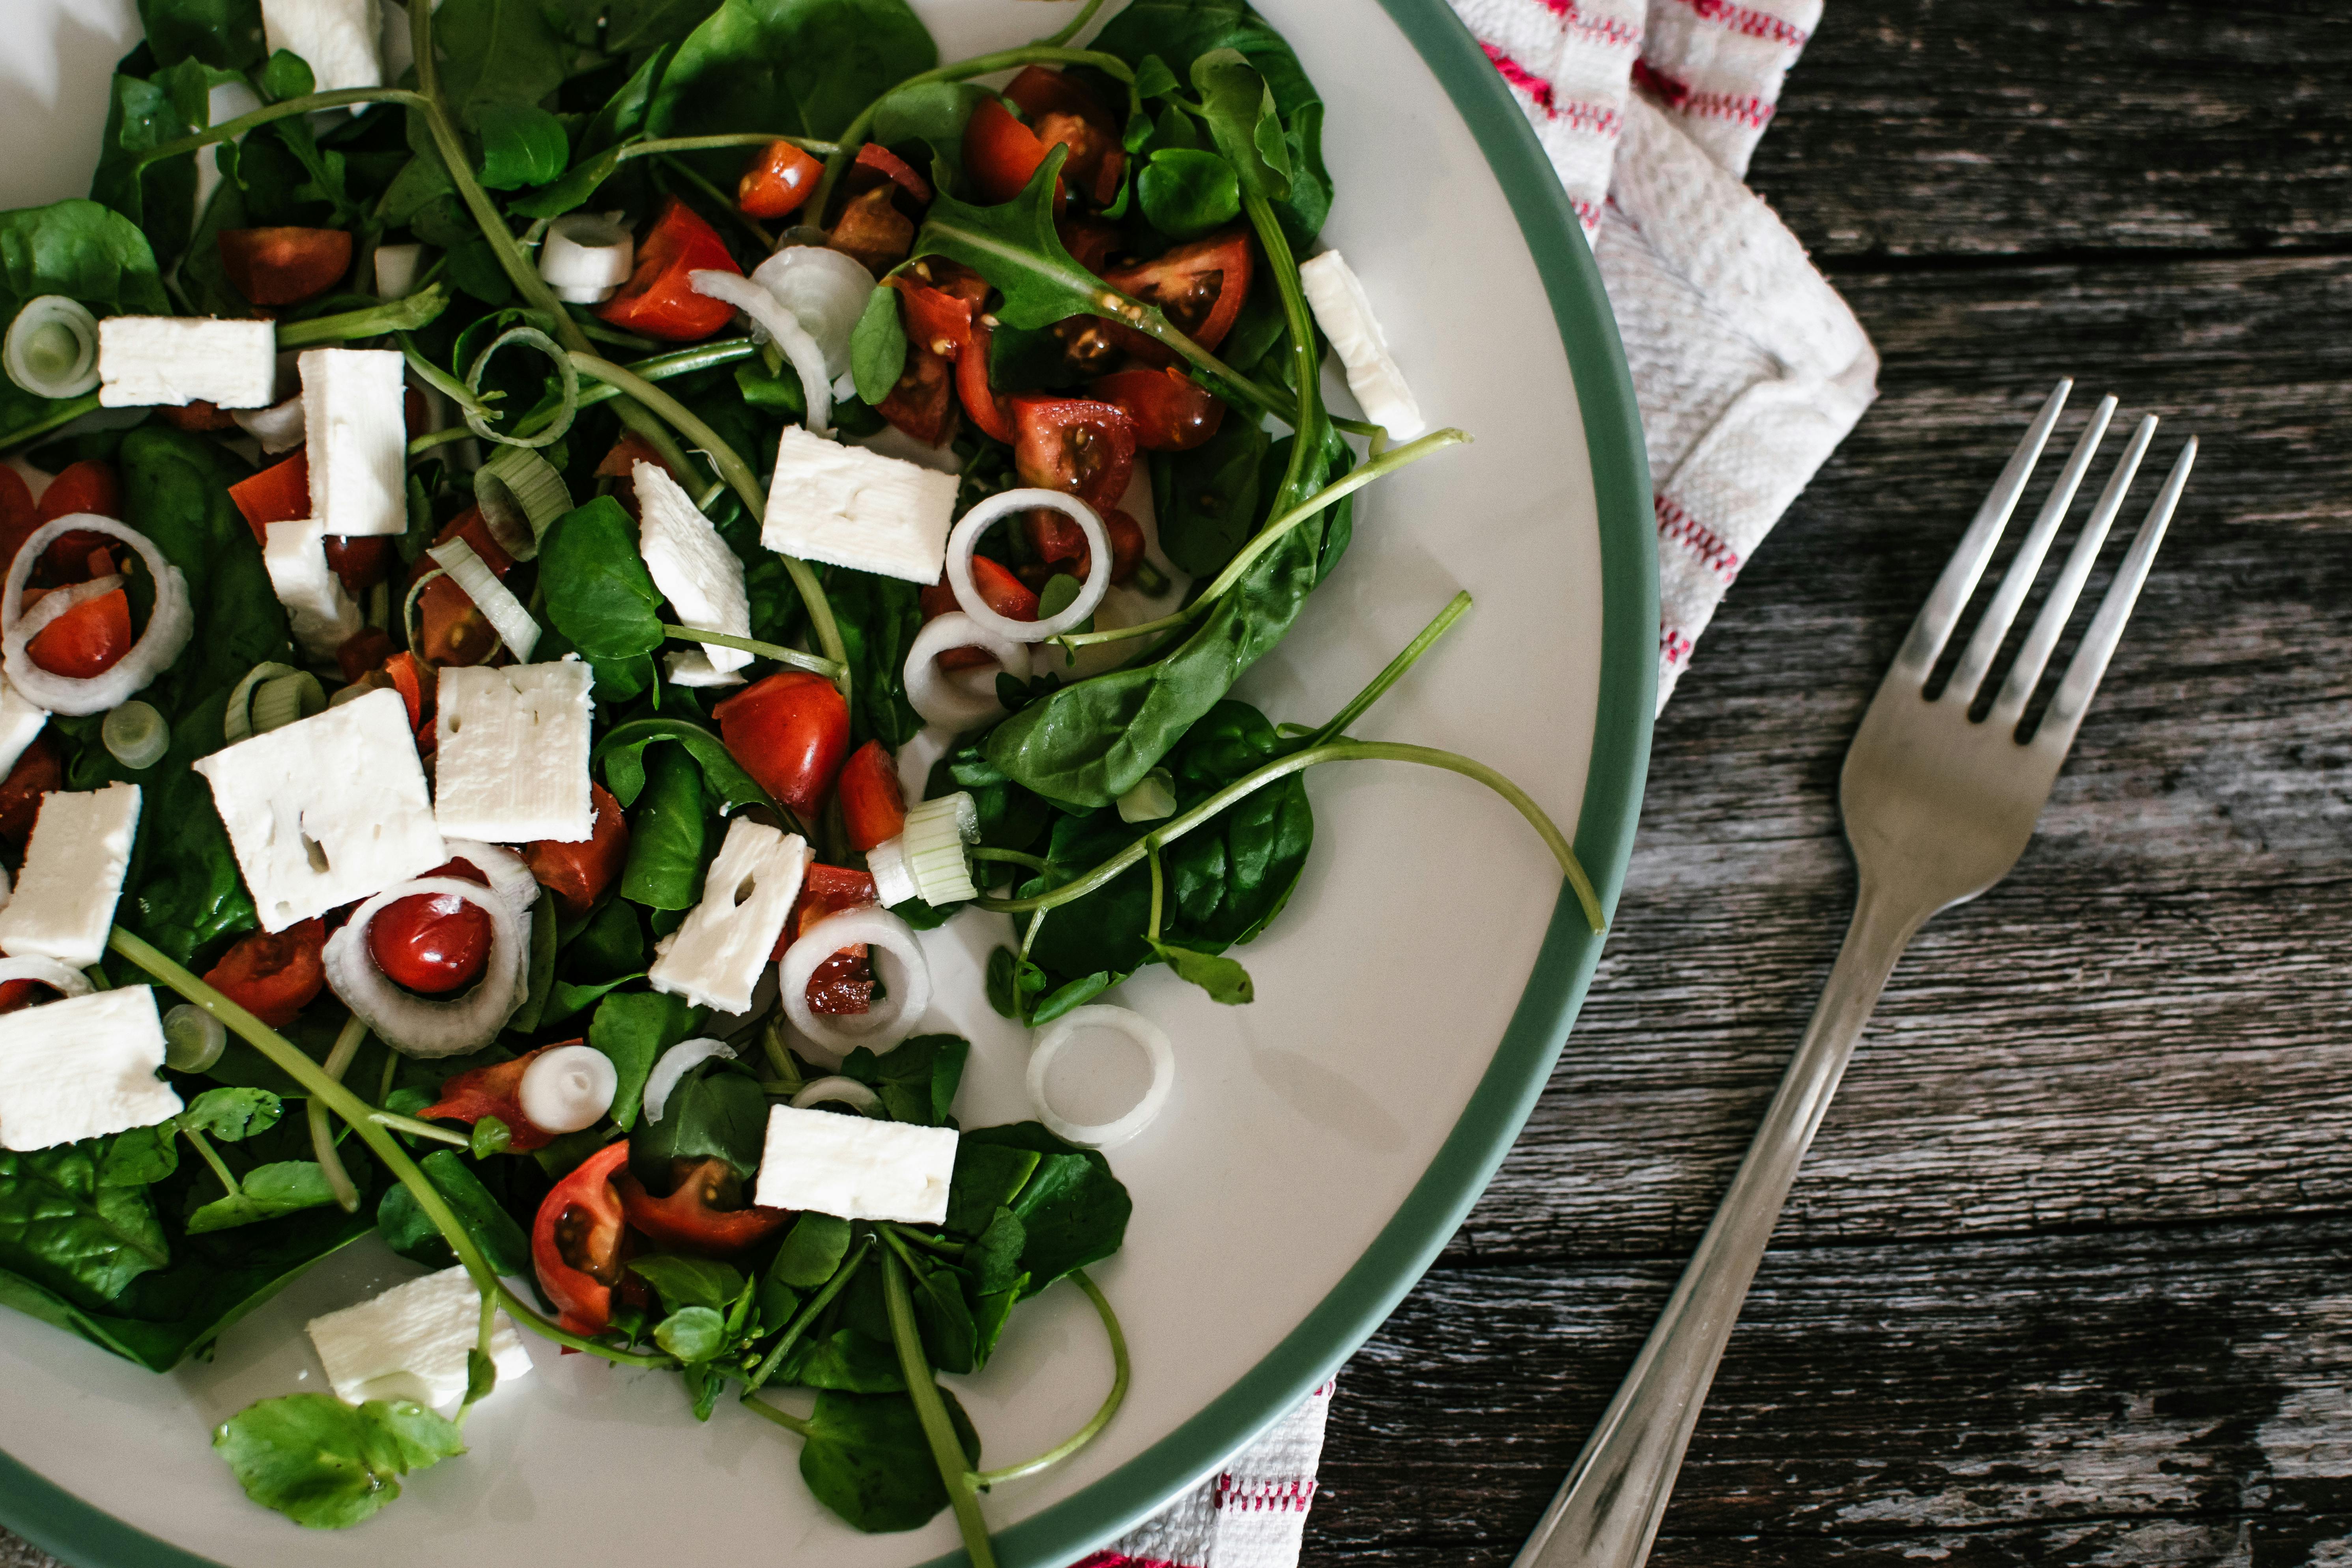
Meal 2 – Chicken Salad with Vinaigrette Dressing

Meal 3 – Salmon with green vegetables

Meal 4 – Cottage Cheese with Mixed Berries

You can have a cup of coffee (preferably organic, Swiss process decaf) in the morning, but prefer green tea in the afternoon and chomemile tea in the evening. Feel free to snack on raw nuts (in moderation, of course).

Regarding supplementation, the only one that I consider absolutely necessary is fish oil. Other than that, a high-quality protein powder, probiotic (or friendly bacteria), and fiber supplement are worth considering, particularly after your workout (this would be your fifth meal if you follow the sample diet outlined above). the mineral is unnecessary if you are eating fresh, healthy foods (again preferably organic) every day.

Don’t let mother nature get to you without a fight. Charge your health with your pension and take action! Getting in shape doesn’t have to be complicated. By following this simple plan, you should be able to reap the benefits of better health at any age.

Where does all the fat go when you lose pounds?

The world is obsessed with fad eating and weight-loss methodologies, but few of us know how fat really melts off the scale.

In fact, even the 150 fitness specialists, dietitians, and trainers we reviewed shared this striking gap in their wellness domain.

The most widely recognized misjudgment, by a wide margin, was that fat turns into vitality.

The problem with this hypothesis is that it does not take into account the conservation law of the problem, which is satisfied by every substance response.

Some respondents thought that fat turns into muscle, which is unimaginable, and others accepted that it escapes through the colon.

Only three of our respondents gave the correct answer, which means that 98 out of every cent of the wellness experts in our roundup couldn’t figure out how weight loss works.

So if it’s not vitality, muscles or the bathroom, where does the fat go?

Here, writing in an article for The Conversation, two researchers from the University of New South Wales to clarify.

The correct answer is that fat is transformed into carbon dioxide and water. You exhale the carbon dioxide and the water mixes with your course until it is lost as urine or sweat.

If you lose 10 kg (22 lbs) of fat, definitely 8.4 kg (18.5 lbs) goes out through your lungs and the remaining 1.6 kg (3.5 lbs) turns into water. At the end of the day, almost all of the weight we lose is exhaled.

This surprises almost everyone, all things considered, almost everything we eat returns through the lungs.

Every sugar you process and almost every fat is converted to carbon dioxide and water. The same goes for liquor.

Protein has a similar fate, except for the small part that is transformed into urea and other solids, which you expel as urine.

The main thing in sustenance that reaches the colon undigested and in its place is dietary fiber (think corn).

Everything else you swallow is consumed in your circulation system and organs, and from then on it won’t go anywhere until you’ve vaporized it.

In general we discovered that ‘vitality in levels with vitality out’ in high school. Be that as it may, vitality is a famously puzzling idea, even among wellness experts and bulk-thinking researchers.

The reason why we gain weight or lose weight is much less secret if we control each and every kilogram, also, not just those kilojoules or cryptic calories.

According to the most recent government figures, Australians spend 3.5kg (7.7lbs) on food and drink a day. Of that, 14.6 oz (415 g) are strong macronutrients, 0.8 oz (23 g) are fiber, and the remaining 6.6 lbs (3 kg) are water.

What’s not spelled out is that we’re also breathing more than 600 g (21 oz) of oxygen, and this figure is just as imperative for your waistline.

If you put 3.5 kg (7.7 lbs) of food and water into your body, plus 600 g (21 oz) of oxygen, then 4.1 kg (9 lbs) of stuff has to come out, or you’ll put on weight .

If you are planning to lose some weight, you should lose more than 9 pounds (4.1 kg). So how would you go about getting this to work?

The 415g (14.6oz) of sugars, fats, proteins and spirits that most Australians eat each day will provide exactly 740g (26oz) of carbon dioxide plus 280g (9.8oz) of water (about a container) and about 35 g (1.2 oz)) of urea and different solids discharged as pee.

The resting metabolic rate of a typical 75 kg (165 lb) man (the rate at which the body uses vitality when the individual is not moving) generates about 590 g (20.8 oz) of carbon dioxide every day. the days.

No pill or elixir you can buy will increase that figure, despite the intense cases you may have heard of.

Fortunately, you exhale 7 oz (200 g) of carbon dioxide while sleeping soundly on a consistent basis, so you’ve officially inhaled a quarter of your daily concentration before you even get out of bed.

So if fat is turned into carbon dioxide, could essentially breathing more influence you to lose weight? Tragically not.

Huffing and puffing more than necessary is called hyperventilation and will only make you confused or possibly pass out.

The main way you can deliberately build up the amount of carbon dioxide your body is creating is by moving your muscles.

However, here is some more encouraging news. Simply standing up and getting dressed dramatically increases your metabolic rate.

At the end of the day, if you just tried on each of your outfits for 24 hours, you would exhale more than 42 oz (1,200 g) of carbon dioxide.

More practically, going for a walk triples your metabolic rate, as does cooking, vacuuming, and cleaning.

Using 100 g (3.5 oz) of fat expends 290 g (10 oz) of oxygen and produces 280 g (9.8 oz) of carbon dioxide plus 110 g (3.8 oz) of water. The sustenance you eat cannot change these figures.

So, to lose 100g (3.5oz) of fat, you have to exhale 280g (9.8oz) of carbon dioxide over what you’ll create by vaporizing all of your food, whatever it is.

Any eating routine that provides less ‘fuel’ than you consume will cheat, but with so many misconceptions about how weight loss works, few of us know why.

How to work like a robot

As the machines become more and more efficient and perfect, it will become clear that imperfection is the greatness of man. -Ernst Fischer

-Robots don’t complain.

-Robots must be maintained to function efficiently.

-Robots must be programmed to do the job well, but once they are programmed, they can do a job faster than a human.

-Robots have to be reprogrammed to do a new task.

Stop complaining

Robots don’t complain. Complaining is making excuses. When you start complaining about the work you have to do, you are looking for reasons not to do it. So maybe your job is harder than it should be. Maybe your boss is being a jerk. Maybe it’s too hot where you have to work. Do not complain. Just do the work and do it. like a robot

Perform maintenance

Robots are machines that must be maintained to remain efficient. Sometimes it is necessary to replace its parts or lubricate them. What about us humans? How do we maintain ourselves to ensure that we are in the best condition to perform at our highest levels?

  • quality sleep – I cannot stress this enough. Good sleep is essential if you want to be efficient at what you do. Getting quality sleep is considered routine maintenance. Robots go off too, you know.
  • Do exercise – To keep your heart healthy and keep your body working the way it should, you need to exercise regularly. You should get at least 30 minutes of exercise 3-5 days a week. If you don’t want to feel sluggish, lethargic, lazy and lazy – get out there and start walking, running or lifting weights.
  • eat nutritiously – It’s amazing how good I feel when I eat well balanced and nutritious meals. Her body was designed to eat nutritious food. If you fill your body with garbage all the time, you’re going to feel like garbage all the time. Would a robot eat shit?
  • take vitamins – Again, your body was designed to take the right supplements to function properly. Talk to your doctor about which supplements you should take. Personally, I take a B vitamin, Vitamin C, Vitamin D, and an Omega-3 capsule. I rarely get sick, even about 4 kids who are always sick and I think it has a lot to do with the vitamins I take. (I used to get sick once a month before taking vitamins).

program yourself

To do a task correctly, robots need to be programmed. Robots working in a car factory don’t start assembling cars on their own. They are given specific instructions and have a specific task.

We are the same way, aren’t we? I didn’t sit down and start designing websites. I have spent years researching, reading, taking courses, and really putting in the work to learn how to do what I do.

To do a job as efficiently as possible, you must program yourself to do it

Forget the bodybuilding gym and try sandbag training for massive gains in strength and muscle stability

Every day, more and more people are turning away from boring traditional gym weights and machines and turning to more primitive training methods for massive strength gains. This can include sandbag training, tire flipping, heavy carrying and lifting, and rope pulling. In my opinion, the most versatile training tool is the punching bag.

Combat athletes, sports teams, fire departments, the military, and Cross Fitters and Seal Fitters are quickly realizing the benefits of sandbag training. With sandbag training, the lift is never truly “linear.” For example, in a clean and press, lifting a bar is easier with the weight balanced and centered. This is not so with a constantly changing punching bag. It requires the load to be really muscular, activating the large muscles as well as the small stabilizing muscles. The sand is also spread over a wider surface. To illustrate this point, the next time you visit a hardware store, grab a 50-pound bag of sand and lift it over your head. It feels almost twice as much as a loaded 50-pound bar.

The sandbag’s versatility is also what makes it a great training tool. They take up virtually no space and can be stored in the corner of a room or in the trunk of your car. No more missed workouts on the go, or when you’re pressed for time. A 15 minute circuit will absolutely explode your muscles unlike a weight workout at the gym. One of my favorite circuits with a sandbag looks like this:

-5 minute warm up for jump rope

5 rounds

– 10 BURPEE PRESSES WITH SAND BAG (Drop down with the sand bag in your hands, do a push up, clean and press the sand bag)

-10 ON EACH SIDE WITH THE SHOULDERS (hold the sandbag on each side of the head, lift it up and lower it to the other shoulder)

-10 SANDBAG SQUATS (hold sandbag behind head over shoulders, squat as low as you can and come back up – be sure to maintain good form)

-10 SANDBAG COLLECTION (Place the sandbag vertically in front of you, lean over and pick up the sandbag, lift it up to your shoulder and replace it. Do it again on the other side.

-Sandbag Ruck (2-5 minutes, take your sandbag, put it on your shoulder and walk or jog with it. Trust me, it’s a lot harder than it looks!)

With sandbag training, a lot can be accomplished with almost no equipment and in a very short time. A virtually indestructible 1000 denier sanity punching bag will give you many years of excellent training and faithful service. Feel free to email me for a free sandbag exercise pdf file at: [email protected]

Happy training!

Secrets of doing yoga in the morning

Whether you are an inexperienced or an advanced user of yoga, everyone should start their day with yoga in the morning. If you are inexperienced and want to start your day in a yogic way, then you should practice yoga every morning as a routine.

Before you start doing yoga, you first need to know how you can get the full benefits of yoga or where to start or what should I do now.

Actually, yoga has several aspects as far as therapeutic uses are concerned.

However, you should throw all the therapeutic benefits of yoga in the trash for now and answer yourself:

Where to start?

Let me confess one thing about yoga: most diseases are cured by doing the yoga routine in the morning every day.

Why should I do yoga according to a daily routine? Especially in the morning…

It is because, in order to cure most diseases, you must remove impurities from your body. That will be achieved if you practice some somewhat special yoga exercises every day in the morning.

Excellent!

Follow the step by step process of daily morning yoga exercises below.

Yoga in the morning:

Wake up very early in the morning. If possible, wake up at 5:00 am, I highly recommend it.

Clean your face, eyes and brush your teeth etc.

Now take a glass of lukewarm water and add one lemon and very little salt and drink it.

Now don’t waste any more time and you should start doing yoga. The first yoga posture is Viparitkarani Mudra.

Viparit Karani-Mudra: Lie down on a soft mat on the floor with your legs straight, here in this position your inner legs will be touching each other and your hands will be on the sides of your thighs. Bend your hands at the elbow and place your palms on your hips. Raise your legs and raise your hips supporting your hands up and inhale deeply. Hold this position for 6-8 seconds and exhale slowly. Drop your hips first, then your legs. Breathe normally. Practice this Yoga posture four times.

Shalbhasana: Lie on your stomach. Her legs are stretched out and her hands rest next to their respective thighs. Inhale and lift the legs together up to the thigh without bending the legs at the knees. Hold your breath there for eight seconds, then slowly lower your legs to the floor. Breathe out slowly. You can do it on one leg to start with, if you find it a bit difficult at first. Practice this Yoga posture four times.

Padahstasana: You are done with all the lying down poses in the morning. Now go ahead and stand up straight. In this pose, your heels touch each other. Inhale and raise both hands up above your head by the side of your ears while palms face out. Breathe out slowly and lower your body, bending forward at the waist. Place your palms on the floor next to your respective feet. Don’t bend your knees here in this position at all. Try to put your head between your knees. Hold your breath and stay in this position for 8-10 seconds, then slowly return to the starting position and breathe normally. This yoga posture should be practiced four times.

By the time you finish these poses, I’m sure you’ll definitely feel some pressure in your stomach and clear out your bowels.

You are fresh as never before, now.

You are done with the postures and now move on to the Mudra section and master Agnisara Dhauti.

Agnisara Dhauti: This is very easy to practice, but a bit difficult to follow correctly. However, I will explain it to you without hiding anything behind it. First sit in Siddhasana with an upright spine. Look forward. Now slowly inhale deeply and pull your lower abdomen and navel region up. Try to touch her spine. Hold this position for six seconds and slowly exhale and return to the starting position. Practice this cleaning process at least 10 times. It is very effective in removing all impurities from the stomach and body. It’s guaranteed.

Now move on to the Pranayama section and master Bhraman Pranayama.

Brahmin Pranayama: This is a very easy Pranayama to follow, but you need to master some technique to practice it. This time you will start the morning walk, but not the traditional morning walk that you are going to do this time. You will do the morning walk Yoga style. Inhale and count one and place the first step forward. Inhale for a count of two and place the second step forward. Keep doing this for up to four counts.

This is like inhaling 1-step 1, inhaling 2-step 2, inhaling 3-step 3, and inhaling 4-step 4. Walk one step at a time with the inhalation on each step. Now do the exact opposite of the inhale. Exhale for a count of one and take your first step forward, then exhale for a count of two and take your second step forward. Keep doing this for up to four counts. After two or three days, you will walk in the rhythm of Yoga Pranayama. Practice this Pranayama for six to seven minutes.

You can then spend more time after a month practicing these exact steps detailed above by tweaking your yogic routine with some new type of yoga pose entries.

The process is the same, but you can get great benefit by practicing salute to the sun just before the Viparitkarani Mudra. These twelve Sun Salutation poses will prepare you to perform any Yoga Asana in the future, plus this is the only yogic exercise that has the ability to remove all blockages from your entire body system. I highly recommend you practice the Sun Salutation.

You can also add two Pranayama just after Agnisara Dhauti as Kapalbhati Pranayama and Anulom-Vilom Pranayama.

Then follow the routine yogic roadmap discussed above.

If you practice these postures and the related Mudras and Pranayamas, I am sure you will get guaranteed success in terms of achieving perfect health in a very short time.

This whole process is also called Sahaja Basti Kriya.

So, start from today…

So, there you have the secrets to make yoga in the morning.

Feed your body, mind and soul with the necessary yogic protein to fight all diseases naturally.

Hope this helps at least one person.

Namaste!

Diet for hives: what to eat and what to avoid if you have hives

It is noteworthy that most allergic symptoms worsen after eating foods such as eggs, shellfish, fish, strawberries, pineapple, tomato, chocolate or drinking alcohol (especially wine and beer) or smoking. During allergies, the body reacts by producing extra histamine, so antihistamine medications are recommended. Other foods that contain large amounts of histamine or release histamine cause severe allergic symptoms; alcohol such as red wine is one of the main triggers. It should be noted that each individual has a different tolerance level for histamine, so different people will react differently on different histamine levels. If your histamine tolerance level is reached; overflows causing allergic symptoms to occur.

The fermentation of food leads to the production of histamine, as in cheese, grits, vinegar, and alcoholic beverages. Unfortunately, some foods naturally have extra amounts of histamine such as tomato, eggplant, and spinach. Food additives, including azo dyes, tartrazine, and preservatives, trigger histamine release. The benzoates found naturally in some foods also cause the release of histamine, which is why they are listed as those to be avoided to reduce allergic symptoms.

Other foods to avoid

i) Meat, poultry, fish and eggs to avoid: most of these products will produce high levels of histamine causing histamine food poisoning known as scombrioid, especially fish, shellfish, anchovies and sardines if they start to go bad.

Egg products should also be avoided, except in their other products like pancakes, bread, cakes, and others.

Avoid all processed, smoked, or fermented meats such as sandwich meat, sausage, weiner, bologna, salami, pepperoni, smoked ham, bacon. Some of these foods use chemicals to cure them, such as ham and meats, giving them a distinctive pink color.

Leftovers are easily acted upon by bacteria, so histamine is especially produced in protein-based leftovers that are kept at room temperature or in the fridge. To prevent this, freeze any leftovers to stop histamine production.

ii) Dairy Products to Avoid: Avoid all fermented milk products containing cheeses, yogurt, buttermilk and kefir, sour cream. When we say cheese we include processed cheese, sliced ​​cheese and cheese spreads that are both fermented and processed; these include cheddar, coldby, blue cheese, brie, camembert, feta, romano, cottage cheese, and ricotta.

iii) Fruits to avoid: On the list are oranges, grapefruit, lemons, limes, cherries, grapes, apricots, avocados, raspberries, blueberries, plums, blackberries, dates, raisins, currants, fresh or dried. In addition bananas, papayas, pineapple, strawberries and tomatoes also release histamine.

iv) Vegetables to avoid: Tomatoes and their derivatives such as tomato sauces, ketchup and others, soy products, spinach, red beans, eggplant, pumpkin.

All vegetables packed in vinegar or salt such as olives, pickles, relishes, and other fermented vegetables such as sauerkraut should be avoided.

(v) Alcoholic beverages to avoid: All types of alcohol should be avoided; including beer and wine for its histamine.

Other foods that should be avoided in the control and treatment of urticaria are some; food additives and food coloring, seasonings such as cinnamon, cloves, vinegar, chilli, aniseed, nutmeg, soy sauce and curry powder, drinks such as tea, coffee, chocolate, cocoa, cola, alcohol and any other that causes allergies. It is recommended to drink lemon water at least 8 times a day.

4 quick and easy tips to burn more belly fat

1) Drink water after each meal (but not during)

When you drink water with meals, you dilute the hydrochloric acid lining your stomach, which leads to improper digestion (or indigestion).

Proper digestion is essential for your body to extract vitamins and nutrients from the food you eat.

If you can’t digest it, you can’t use it. Where does that leave you?

If you’re used to drinking water with your meals, you think skipping water sounds incredibly difficult, but as you’ll see, the opposite is true.

I thought that too, but it’s actually quite easy. Just decide not to drink water with food. Most fruits/vegetables and carbohydrate foods contain a lot of water, and your body easily absorbs the water found in food.

When you eat, do not have water or near you. Rather, leave it in the fridge.

One big plus is that a glass of ice cold water tastes amazing after a meal.

Be sure to wait at least 30-45 minutes before drinking water after eating, as you want to allow some time for digestion. Drinking water too soon after eating will cause a dilution of hydrochloric acid that interferes with proper digestion of nutrients.

2) Exercise before eating a cheat meal

The #1 time of day you can get away with eating more and worse food is after you work out.

This is because meals high in sugar and carbohydrates cause an insulin spike, which at any other time of the day can lead to fat gain, but after a workout, the insulin spike can speed up muscle recovery. and it will not have a negative impact on your waist (belly). fat storage).

Best to do a full workout at the gym and then go home and eat a cheat meal an hour later.

If hitting the gym isn’t in your plans, you can drop in and do about 50 push-ups, 40 body squats, pull-ups, pull-ups, or triceps wall extensions. Finish your workout by doing at least 30 minutes of jogging outside or 15 to 20 short hill sprints.

3) Read food labels

Avoid any foods with the words: soy, hydrogenated, vegetable oil, high fructose corn syrup, extract, gluten, preservative, aspartame and monosodium glutamate (this will probably be hidden under “natural flavoring” or hydrolyzed vegetable protein).

In fact, you should strive to avoid anything with more than 4-5 ingredients. Say no to Frankenfoods whose ingredient list reads like a book.

You should always avoid packaged processed foods even though sometimes you crave some sauce or some soup or something. Check the labels for the best option. As a fun game, next time you go to the grocery store, try to find 4 items without those nasty ingredients!

You may be surprised at what you have been eating all this time.

4) Eat High Carb/Low Fat or High Fat/Low Carb

To limit the accumulation of abdominal fat, you must limit the consumption of fats or the consumption of carbohydrates. That means if you ever want to eat more carbs, just cut back on your fat intake.

If you are eating high fat that day, reduce your carbohydrate intake. It doesn’t have to be all the way to zero, just turn it down.

6 Second Ab Reviews – Does Six Second Abs Really Work?

You’ve seen the six-second abs on TV and you may be wondering what all the fuss is about. This program is designed to help you tone and strengthen your abs in a six-second series of exercises.

This is an exercise machine that allows you to do crunches without having to crouch down on the floor. Helps you maintain perfect form for an exercise program while sitting instead of lying down.

To do crunch exercises on this machine, click down three times on the machine and then click up three times again. Each click is one second apart and in six seconds you will have done a perfect sit-up. This program claims to give you the perfect workout for your abs by combining the right resistance with your workout.

To choose the resistance level you want, simply adjust the orange and yellow bands on the kit to choose a resistance level between 15 and 55 pounds. According to the ads, this exercise equipment will help you work your upper abs and obliques. You can even do reverse crunches to work your lower abs.

Consumers who purchased this abs product gave it mixed reviews.

However, most seem to be disappointed with their purchase, saying that the bands do not have the resistance that is claimed. The ads say that you will actually feel your abs burn fat, but most consumers say that is a false statement.

On the other hand, there are consumers who praise the usefulness of the kit and say that it has really helped them. These customers say that those who have had disappointing results were simply not using the equipment correctly. Before you go out and buy this machine, you should try one out beforehand to see if it’s the right piece of equipment for you.

5 effective vocal tips for public speaking

A few weeks ago at my local Toastmasters club in London, I had the privilege of seeing a former member stand up and speak to us in an organizational capacity. I couldn’t help but notice how resonant, rich and, in the words of my former vocal coach, “fruity” his voice sounded.

It reminded me that I should do more to improve and maintain my range and vocal skills.

Imparting vocal tips and techniques has little difficulty in the form of the written word, as it is a topic that has many aspects such as voice development, voice warm-up, articulation exercises, vocal range stretching, etc.

Then, of course, it comes down to individual vocal problems that need to be resolved. The best way to experience vocal exercises is in person with a vocal coach. Or if that’s not possible, perhaps on video or DVD.

Why is it important to exercise your voice? Well, fundamentally, it’s because the voice, both for a speaker and an actor, is an important part of one’s instrument. It sounds a bit silly to refer to your body and voice as your instrument, but if you think of it as a speaker or presenter, you’re only using yourself. It is his method of expression. Yes, you can have a presentation or props, but you are the one people listen to and if your voice isn’t clear and you use your full range of expression then your listeners will be turned off.

Without getting too bogged down in the science of the articulatory muscles and how they work, I’ll quickly mention what they are: the tip of the tongue, the hard palate, the soft palate, the back of the tongue, the teeth, and the lips.

Now there are probably plenty of professional vocal coaches who are ready to argue with me on these points and say that I should tell them what the correct categories are, whether they are active or passive articulators. But for the purposes of this post, I don’t think it’s necessary.

so here are some 5 dos and don’ts for vocal advice :

Do not consume dairy: Before you speak or present, be sure to keep your dairy intake to a minimum. Dairy products have a tendency to produce excess mucus that can make you gasp and constantly feel like you need to clear your throat. Stay lubricated by drinking plenty of water or herbal tea. Too much caffeinated tea can dehydrate you. If you are drinking a lot of water before you speak, remember to use the toilet (bathroom).

say your words out loud: I have discussed the benefits of rehearsing your speech or presentation elsewhere on this blog. By saying the words out loud, his mouth gets used to saying the words, and as a result, he’s less likely to stumble over what he’s saying because his body has a physical memory.

Hum before you speak: When humming softly, your voice becomes a buzz and drops in range and warms up. In drama school we used to hum a very slow version of the nursery rhyme “Pop Goes The Weasel.” As a quick refresher, here are the lyrics as I know them:

“Half a pound of twopenny rice,

Half a pound of molasses.

This is how the money goes

Pop! goes the weasel”.

Just go to Wikipedia where they have alternate versions of the letters that you may be familiar with. There’s also a melody notation in there for anyone unfamiliar with it. It’s a pretty jolly little jig, but you’ll want to slow down when humming it. Also, make sure you don’t put pressure on yourself. Be gentle.

use tongue twisters: Tongue twisters are a good way to exercise the muscles of the joints. Here are a couple of my favourites:

“Articulatory agility

is a desirable skill

skillfully manipulate

the tongue, the palate and the lips”.

“Red leather, yellow leather.” (repeat 5 times)

“The tip of the tongue, the teeth, the lips.” (repeat 5 times)

“The back of the tongue and the tip of the tongue.” (repeat 5 times)

These exercises should be used regularly, every day if possible, as you can’t expect to feel any improvement if you only do everything once.

Be sure to articulate When I say this, you don’t have to articulate your words too much to sound like Richard Burton. What I mean is that you should be careful not to have sloppy speech. Try rehearsing your speech out loud and record yourself. Listen to it a few times to get over that horrible feeling of hearing your own voice. Then listen to it to make sure your words are coming through clearly and that you are getting all your T’s and D’s right in your words.

These tips are merely scratching the surface of a vast and constantly fascinating subject. There are plenty of great books on the subject. The techniques I have been trained in come from previous vocal coaches at The Royal Shakespeare Company and The Royal National Theater in the UK.

Try implementing these dos and don’ts before you give your next speech or presentation, and you’ll see a marked improvement in your vocal clarity.

Yoga and Pregnancy

If you’re pregnant and already in yoga classes, don’t be afraid to take a break from your current classes or take a class that’s less strenuous. Even if you have not yet gone public with your pregnancy, you should have a confidential conversation with your instructor to let him know about her pregnancy, the instructor will be able to help you with less strenuous poses or teach you poses that you are not doing that will help.

If you’re new to yoga and looking for a low-impact form of exercise, your best bet is to look into a prenatal yoga class. These classes are designed for pregnant parishioners and you can start them as early in your pregnancy as you like. If you have morning sickness, you may want to wait until it passes and that is usually the second trimester.

If you’ve been practicing yoga for a while, you may find your regular classes too intense. Prenatal classes may seem too easy, so at this point she will need to decide which class she should take on any given day based on how she feels.

The solution could also be to include some prenatal poses that have been adapted to your regular routine. If you’re in a class, your yoga instructor can help you with special poses developed for pregnancy and your changing body. As you enter your second or third trimester, prenatal classes may be a better fit for your changing body and shape.

If you do Yoga with videotape, you should purchase a prenatal video. Some of the recommended poses are those that open the hips, such as Dove, Triangle, Warrior II, and Knee to Ankle.

Second bedroom?

Are you a fan of Yoga and want to continue your practice during pregnancy? Yoga can be continued through the second trimester with just a few precautions.

By the second trimester, your morning sickness should be over and you should be feeling better.

If you haven’t started yoga yet and you want it too, and you’re in luck, “now is the perfect time to start.”

Always contact your health care provider before starting any new exercise program. This is a good rule of thumb even if you are not pregnant.

Start by finding a class with an excellent and experienced instructor. Many women enter yoga for the first time during pregnancy, so don’t worry, you’ll be the only new pregnant woman in the class. Talk to your friends and get referrals to an instructor.

If you already practice yoga, it is not necessary that you leave your classes if you feel strong enough to do them. You can add your own adaptations to the poses when you adjust them. As your belly grows, the more adaptations you will need to make. You’ll want to take any inversion pose toward the wall if it poses a fall hazard. If you don’t feel comfortable doing these poses, then it’s okay to give your body permission to skip them. One that you can safely practice is legs up the wall pose.

If you practice at home, you might still consider going to a prenatal class at least once or twice a week. She will be able to connect with other pregnant women there and know that she is not alone in what she is going through.

Some yoga poses you’ll want to avoid during your second trimester or at least accommodate your growing belly. The deep twists of the belly compress all the internal organs, including the uterus. You can continue to do the twists, just do them gently from the shoulders instead of the tummy.

Of course, avoid any jumps or poses that require backbends. Abdominal strengtheners should be avoided as they need to be softened in preparation for delivery. Of course, lying on your stomach should not be practiced once it starts to show. It will probably be too uncomfortable for you anyway.

Practice the labor breath, taking a deep breath in through your nose and slowly out through your mouth.

Third quarter?

In the third trimester of your pregnancy, everything becomes more difficult to do. Tying your shoes, climbing stairs, and even rolling over in bed can be a chore. Yoga will become more difficult and you need to use more caution, but there is no reason why you cannot continue practicing yoga until your scheduled date.

For those who were working and are now on maternity leave, you may now be finding time to do prenatal yoga. You will continue to benefit from stretching and gentle yoga poses. If you attend a class, make sure your teacher knows when to do so. Remember, now is the time to take it easy. This is not the time to be a winner. Always check with your doctor before starting any exercise program or if you have questions about which prenatal yoga is best for you.

If you are listening to your body, it will tell you what you can and cannot do. Stay in touch with your body, allow your body to take it easy. It’s a good idea to keep practicing your breathing, as this will help you through the labor process.

Some poses that are recommended for the third trimester are those that open the hips, such as Pigeon, Warrior II, Triangle, and Knee to Ankle. The four Cat-Cow positions will also help prepare the baby for delivery. They will help the baby to get into the proper position, with his head down and his back toward her belly.

Of course, the same poses that you adapted during your second trimester need to be practiced with extra caution. No jumping jacks, no twists from the belly, no deep back bends or anything that involves strengthening the abdomen. Needless to say, there shouldn’t be any poses that require you to lie on your stomach.

One of the most important aspects to remember when practicing Yoga during pregnancy is to control your breathing and listen to your body. Practicing yoga and listening to your body will help you mentally prepare for the labor process. As you learn to be in the moment and calm your inner body, yoga will help you with that, as well as your breathing exercises.

Pregnancy does not have to be an obstacle in your Yoga practice. In fact, it can be a vital part of your prenatal routine. With poses designed for pregnancy and incorporating routines that will help you have an easier delivery. You will find some routines that you cannot do. If you’re not sure about the poses, listen to your body. It will tell you which ones are too much for you later in your pregnancy.

So, don’t be afraid to continue your Yoga practice. It can mean that you will have an easier delivery and faster recovery after birth. It should also make getting back into shape after the birth easier.